






Creating a development store is one of the first steps of signing up a client for Shopify. Development stores can also be used for testing demos and even for portfolio purposes. Development stores is not a new thing for people with Shopify Partners, but for beginners, it might sound unfamiliar. To know what is a development store and to know how to create a development store, in this article, we have everything you need to know.
This article on how to create a development store on Shopify will provide you with some helpful and detailed information about the definition of a development store, how to create a Shopify Partner account, how to create a development store and how to transfer the ownership of that store. We recommend that you should make note of each part to help you master in doing this.
What is a development store on Shopify?
On Shopify, a development store is a free Shopify account that allows developers and Shopify Partners to create and build stores without incurring any costs. These stores are primarily used for setting up client projects, testing new apps or themes, and experimenting with Shopify's features.
Development stores include all the standard Shopify functionalities of the Advanced Shopify plan, allowing developers to work in a fully functional environment.
While building and testing a development store, you can:
- Process unlimited test orders
- Create an unlimited number of unique products
- Create up to 10 custom apps
- Assign a custom domain
Development store limitations include:
- You can only install free apps and partner-friendly apps while the store is in development.
- You can test orders using the Bogus Test Gateway or by enabling test mode for your payment provider. However, you cannot test real transactions using active payment providers.
- You can generate and print test shipping labels, but to purchase functional shipping labels, you must switch to a paid plan.
- You cannot remove the password page until the store is moved to a live plan.
- Once the store is transferred to a live plan, it no longer qualifies for promotions or free trials.
How to Create a Development Store on Shopify
Before you can create a development store, you need to sign up as a Shopify Partner. This is free, and it allows you to create unlimited development stores and earn revenue through Shopify’s Partner Program.
Create a Shopify Partner Account
Step 1: Visiting the Shopify Partner Program Website

On the landing page of this website, you can check out some helpful courses and resources from the menu to help you get started and stand out from the crowd.
Step 2: Click Become a Partner
To join the Shopify Partner Program, simply click Become a partner and create an account using your email or by connecting with your Google, Facebook, or Apple account.

Step 3: Getting your email address verified
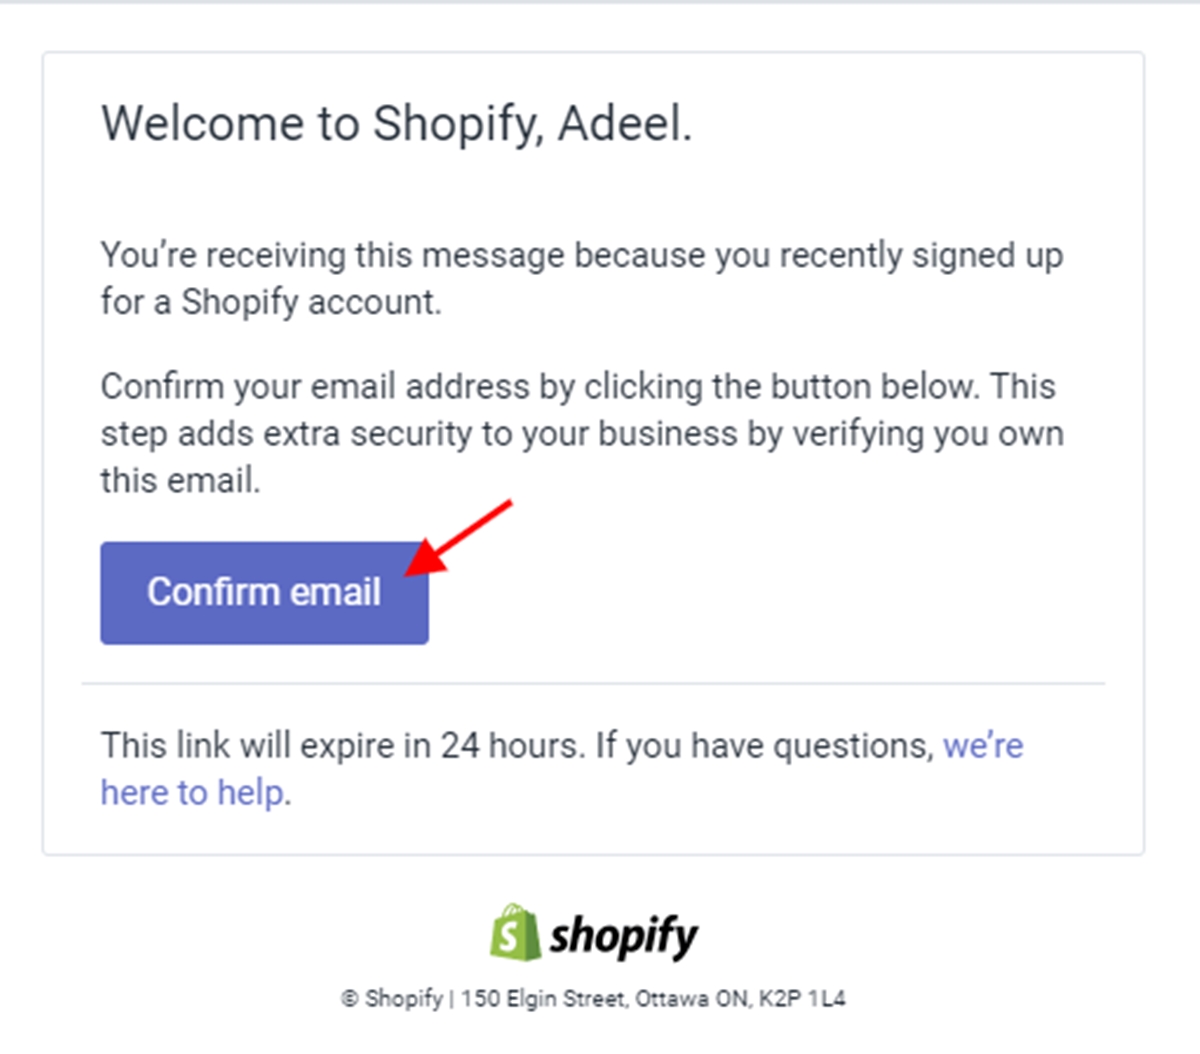
Immediately after you finish creating your account, Shopify will send you an email for verification purposes. You only need to open the email and find the button Confirm email. Please keep in mind that you need to get your email verified within 24 hours before the expiration time.
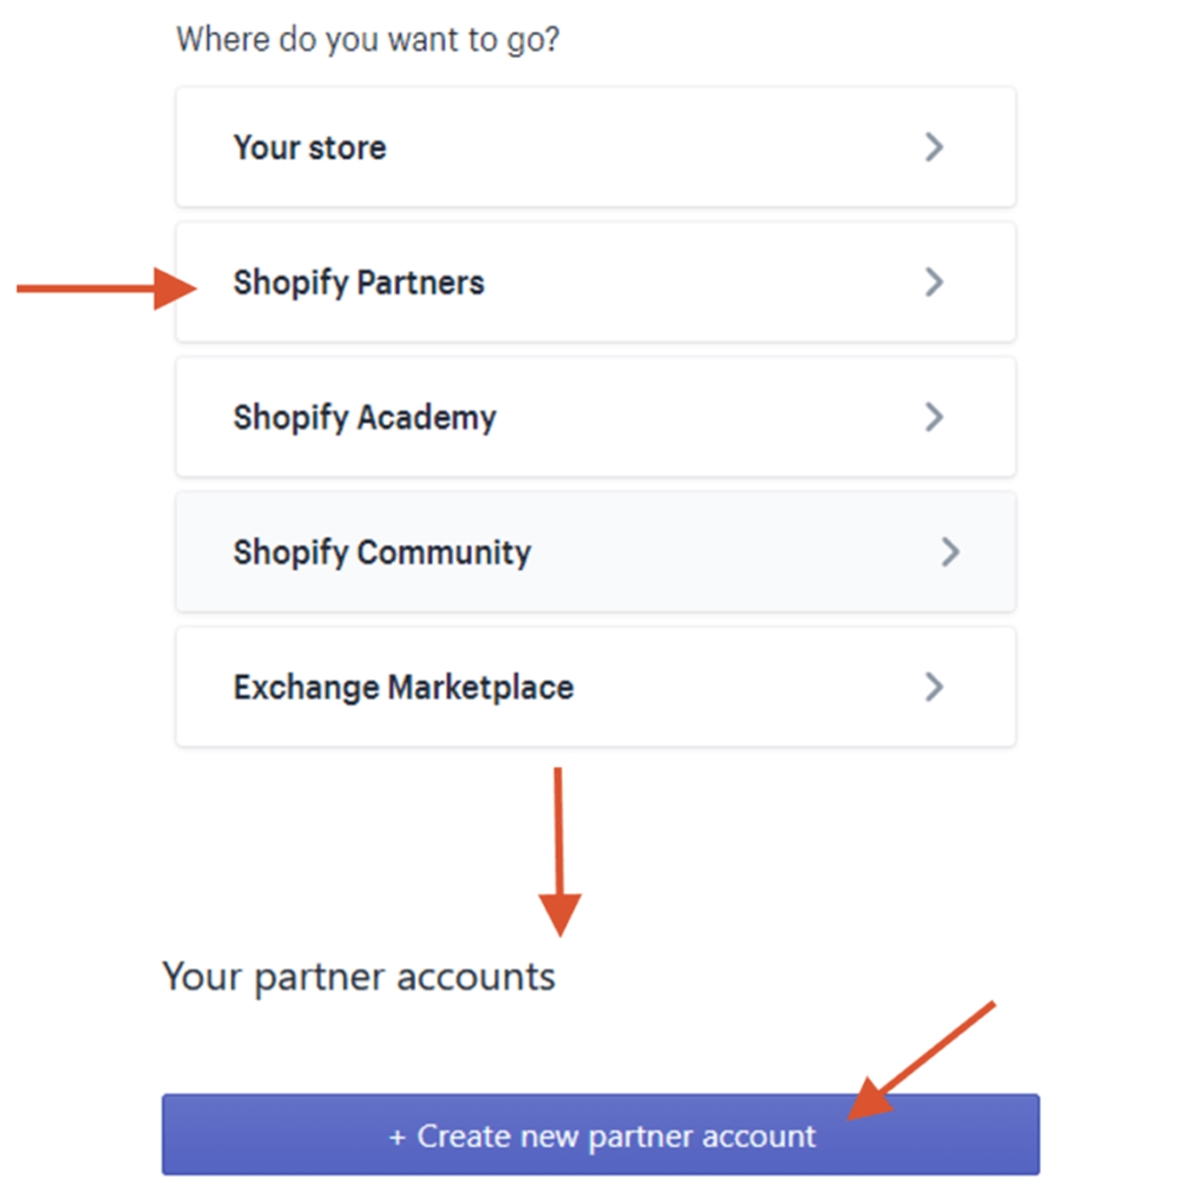
As soon as your email address is verified, you will be led to the Shopify accounts page. On that page, you need to choose the Shopify Partners button and then select the Create new partner account button.
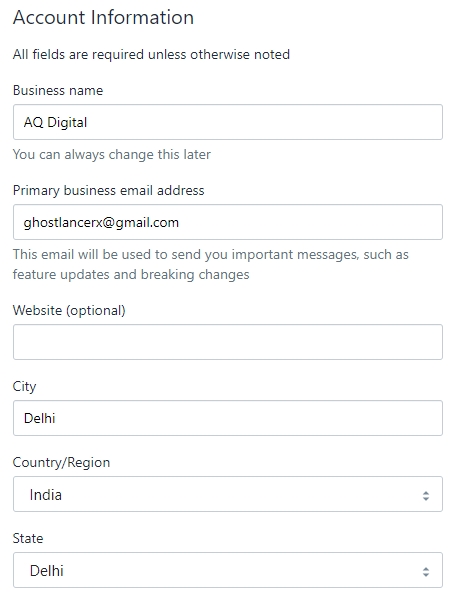
Step 4: Fill in the form
In this final step, you need to enter your business’s details in all fields except for the optional ones.
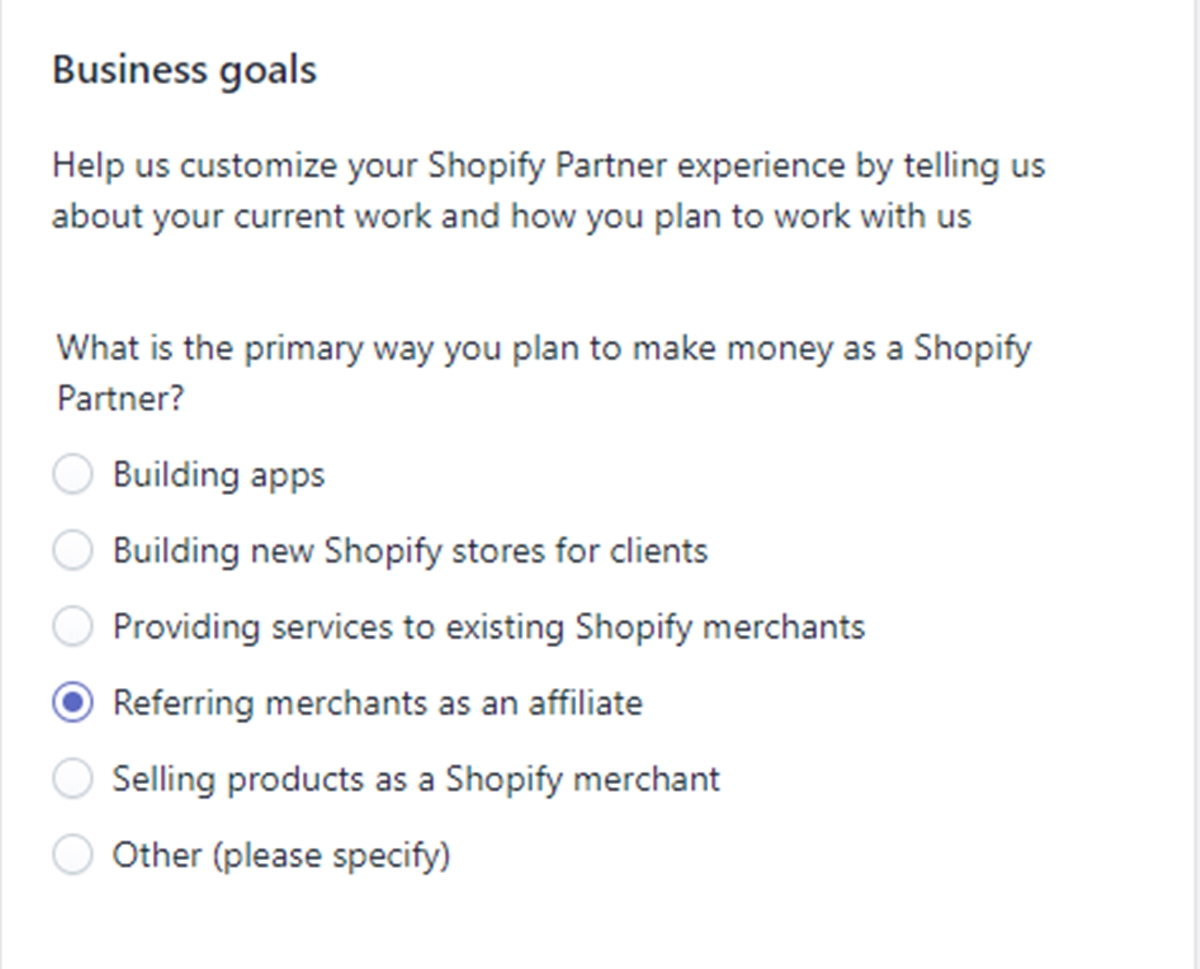
After that, please move down and check out the section named “Business goals”. Here, you have to choose one out of many options which is most suitable for you. You can also write your own business goals if none fits your purposes.
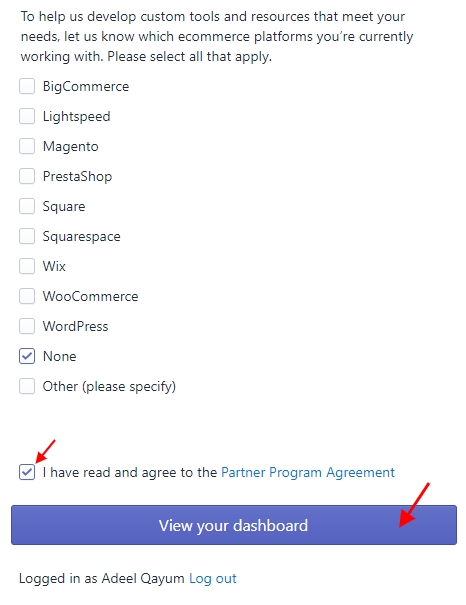
Below the “Business goals” section, you will see a list of eCommerce platforms for you to choose from. It is necessary that you select the platforms you use because it will help Shopify to provide the suitable tools and resources for you.
After you have filled in the form, chosen your business goal and select the right platforms, the last thing you need to do is to read and accept the terms of the agreement by ticking the box at your left and then click “View your dashboard”.
In your dashboard, you are able to access a diversity of programs for beginners and they are all free.
Create a Development store on Shopify (Step-by-step Guide)
As you have done creating a Shopify Partner account, you can now begin creating a development store. To help you create your development store, here is a step-by-step guide for you:
Step 1: Open Partner Dashboard
Go to your Partner Dashboard.

Step 2: Add store
Choose Stores. Then click on Add store.
Step 3: Select Development store
Select Development store button which is in the section Store type.

Step 4: Choose one reason why you decided to create the store
In the section named What is the purpose of this store?, choose one reason why you decided to create this development store.
- Create a store for a client
- Create a store to test and build
Your choice here will affect the information you need to fill in the create the development store.

Step 5: Fill in the Information and Configuration
If you're choosing to create a store for a client, fill in:
- The store name & location
- The products that your client wants to sell
If you're choosing to create a store to test and build, fill in:
- The store name
- Choose the build version
- Choose the data and configuration option
Step 6: Click Create Development Store
After finishing all the settings above, click on the Create Development Store button

How to transfer ownership of a development store?
Transferring ownership is for when you want to hand over a development store to your clients. As your clients are waiting to get started, the only step you need to do is transferring store ownership. And to help you with that, here is how:
Step 1: Choose Stores
Go to your Partner Dashboard and choose Stores.
Step 2: Choose Transfer ownership
Find the store you want to transfer to and choose Transfer ownership right next to it.
Step 3: Select the new owner of the store
After that, the Transfer store ownership will be shown. Here, you need to select the new owner of the store from the list of eligible new owners, or you can click Add a staff account and make a new account for your client if your client has not been a staff member yet.
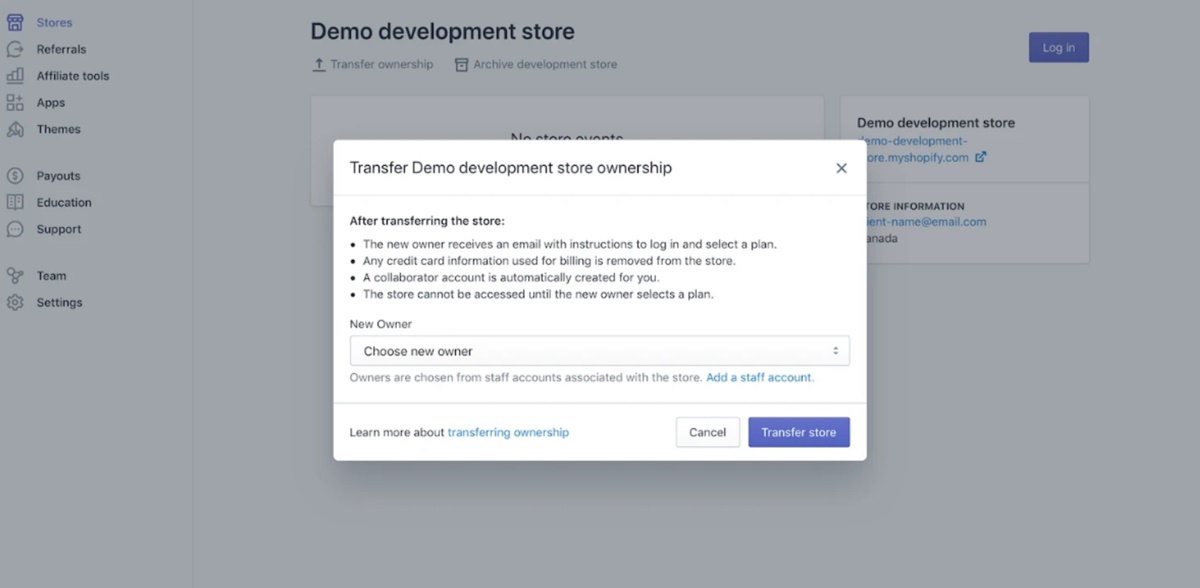
Step 4: Click Transfer store
After choosing the new owner, the last thing you need to do is click Transfer store. Then, the new owner will receive an email with instructions to help them create an account and choose a suitable plan. Only after the new owner accepts the transfer of the new store is the store in “paused” status. Significantly, when your client chooses a suitable Shopify plan, you begin to get your monthly recurring revenue share, and a collaborator account is automatically created.
Final words
That is all you need to know about the Shopify development store. A development store tests new themes and apps to see if they fit and for setting up a store for your client. Before creating a development store, you need a Shopify Partner account. Also, after you have made a new store for your client, you need to transfer the ownership to help them get up and running.
The process for each part is simple and easy to follow. We hope that this detailed and informative guide will help you create a development store.